Using Refresher to patch a game on RPCS3
Refresher has native support for decrypting and patching RPCS3 games. This guide aims to show you how to operate Refresher's RPCS3 patcher. At the end of this, you will be able to select your server of choice inside the game patches menu of RPCS3.
To download Refresher, you must first visit the Releases Page.
Then, pick the option corresponding to the OS running on your computer. On macOS, you will have to run a terminal command to get Refresher to run correctly. Those instructions are listed on the GitHub release.

Once you have downloaded the built binaries for your computer, simply unzip the archive, and you should have an executable.

Step 1: Update your game to the latest version
Refresh requires your game to be on the latest version. This is trivial on a real PS3, but not so trivial for RPCS3.
Thankfully, the RPCS3 developers have provided a helpful guide on how to do this:
Step 2: Enter the location of RPCS3's filesystem
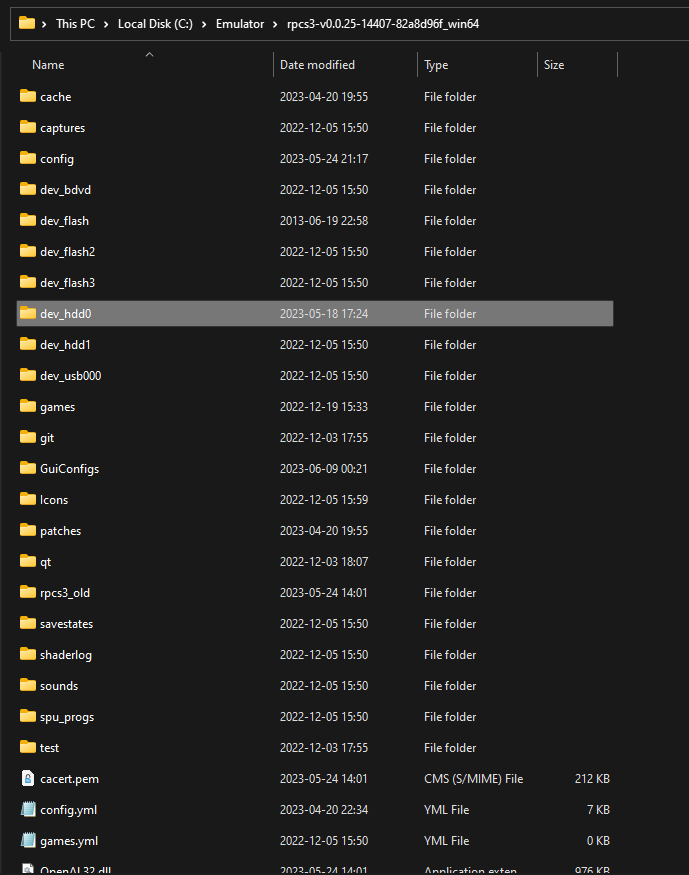
Every copy of RPCS3 has a folder titled dev_hdd0 containing game files and digital licenses required for Refresher to modify the game. Obviously, you can't patch anything without knowing where anything is, so we need to tell Refresher where this folder is!
If you are on Linux or macOS, this will be automatically detected for you, and you do not need to do anything. On Windows, however, the files aren't at any particular known location. Refresher is unable to read minds at this current point in time, so you'll have to provide this directory.
Here's where it should be:

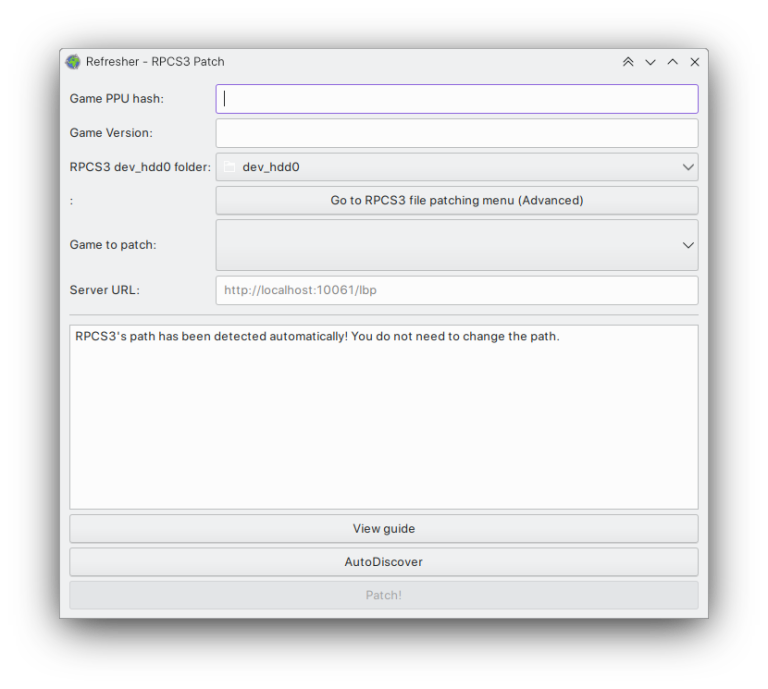
Once you've found this folder, head back to Refresher and click 'Browse' in the top field. Navigate to this directory and click Select Folder. Click 'Game To Patch' and all the games loaded into RPCS3 should appear.
Step 3: Fill in the server URL
You should have been given a URL by the person operating the server you're trying to connect to. Copy this URL into the second field - the one named 'Server URL'.
Next, hit the button that says 'AutoDiscover'. This will trigger Refresher to attempt to connect to the remote server to gather more details and extra patching instructions from it. AutoDiscover is required for some games, so you should always use it.
If successful, Refresher will automatically fill in the appropriate settings from that server.
Step 4: Patch!
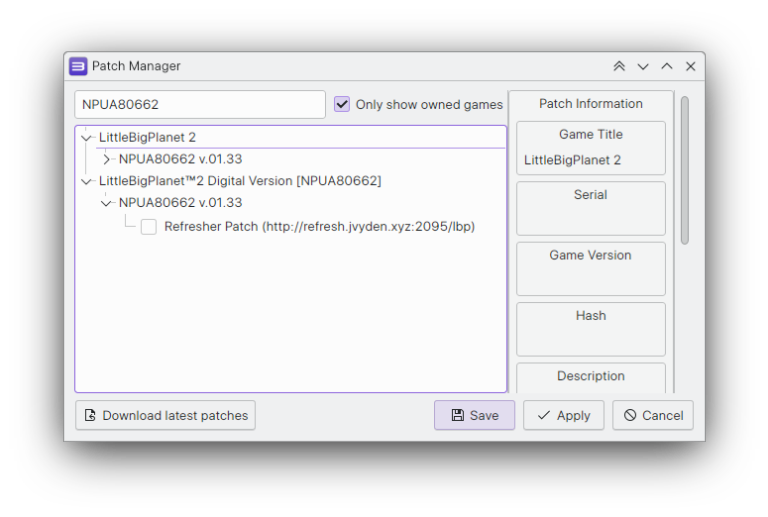
Now, click the patch button. It should decrypt the game, and add a new entry to your game's patches menu.
Open up RPCS3, right-click the game and select "Manage Game Patches". Enable the patch titled "Refresher".

When all is set and ready to go, register an account on our website, and then open the game and start browsing levels to activate your account!
Step 5: Enable RPCN in RPCS3
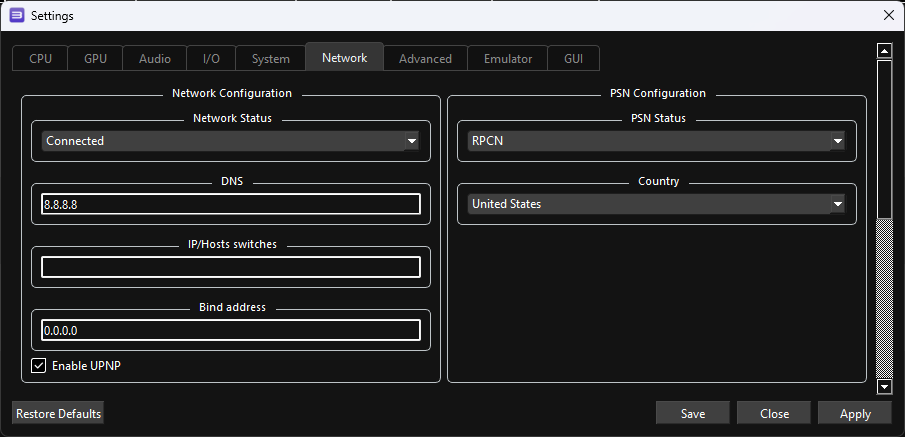
To actually enable RPCN, you need to adjust some settings in RPCS3. Here's how:
Click 'Config' at the top of the RPCS3 main window.
Go to the 'Network' tab.
Set PSN Status to RPCN.
Set Network Status to Connected.
Set DNS to 8.8.8.8 or 1.1.1.1.
Click the checkbox to Enable UPNP.
Click Apply and Save.
Your network settings should look like this now:
